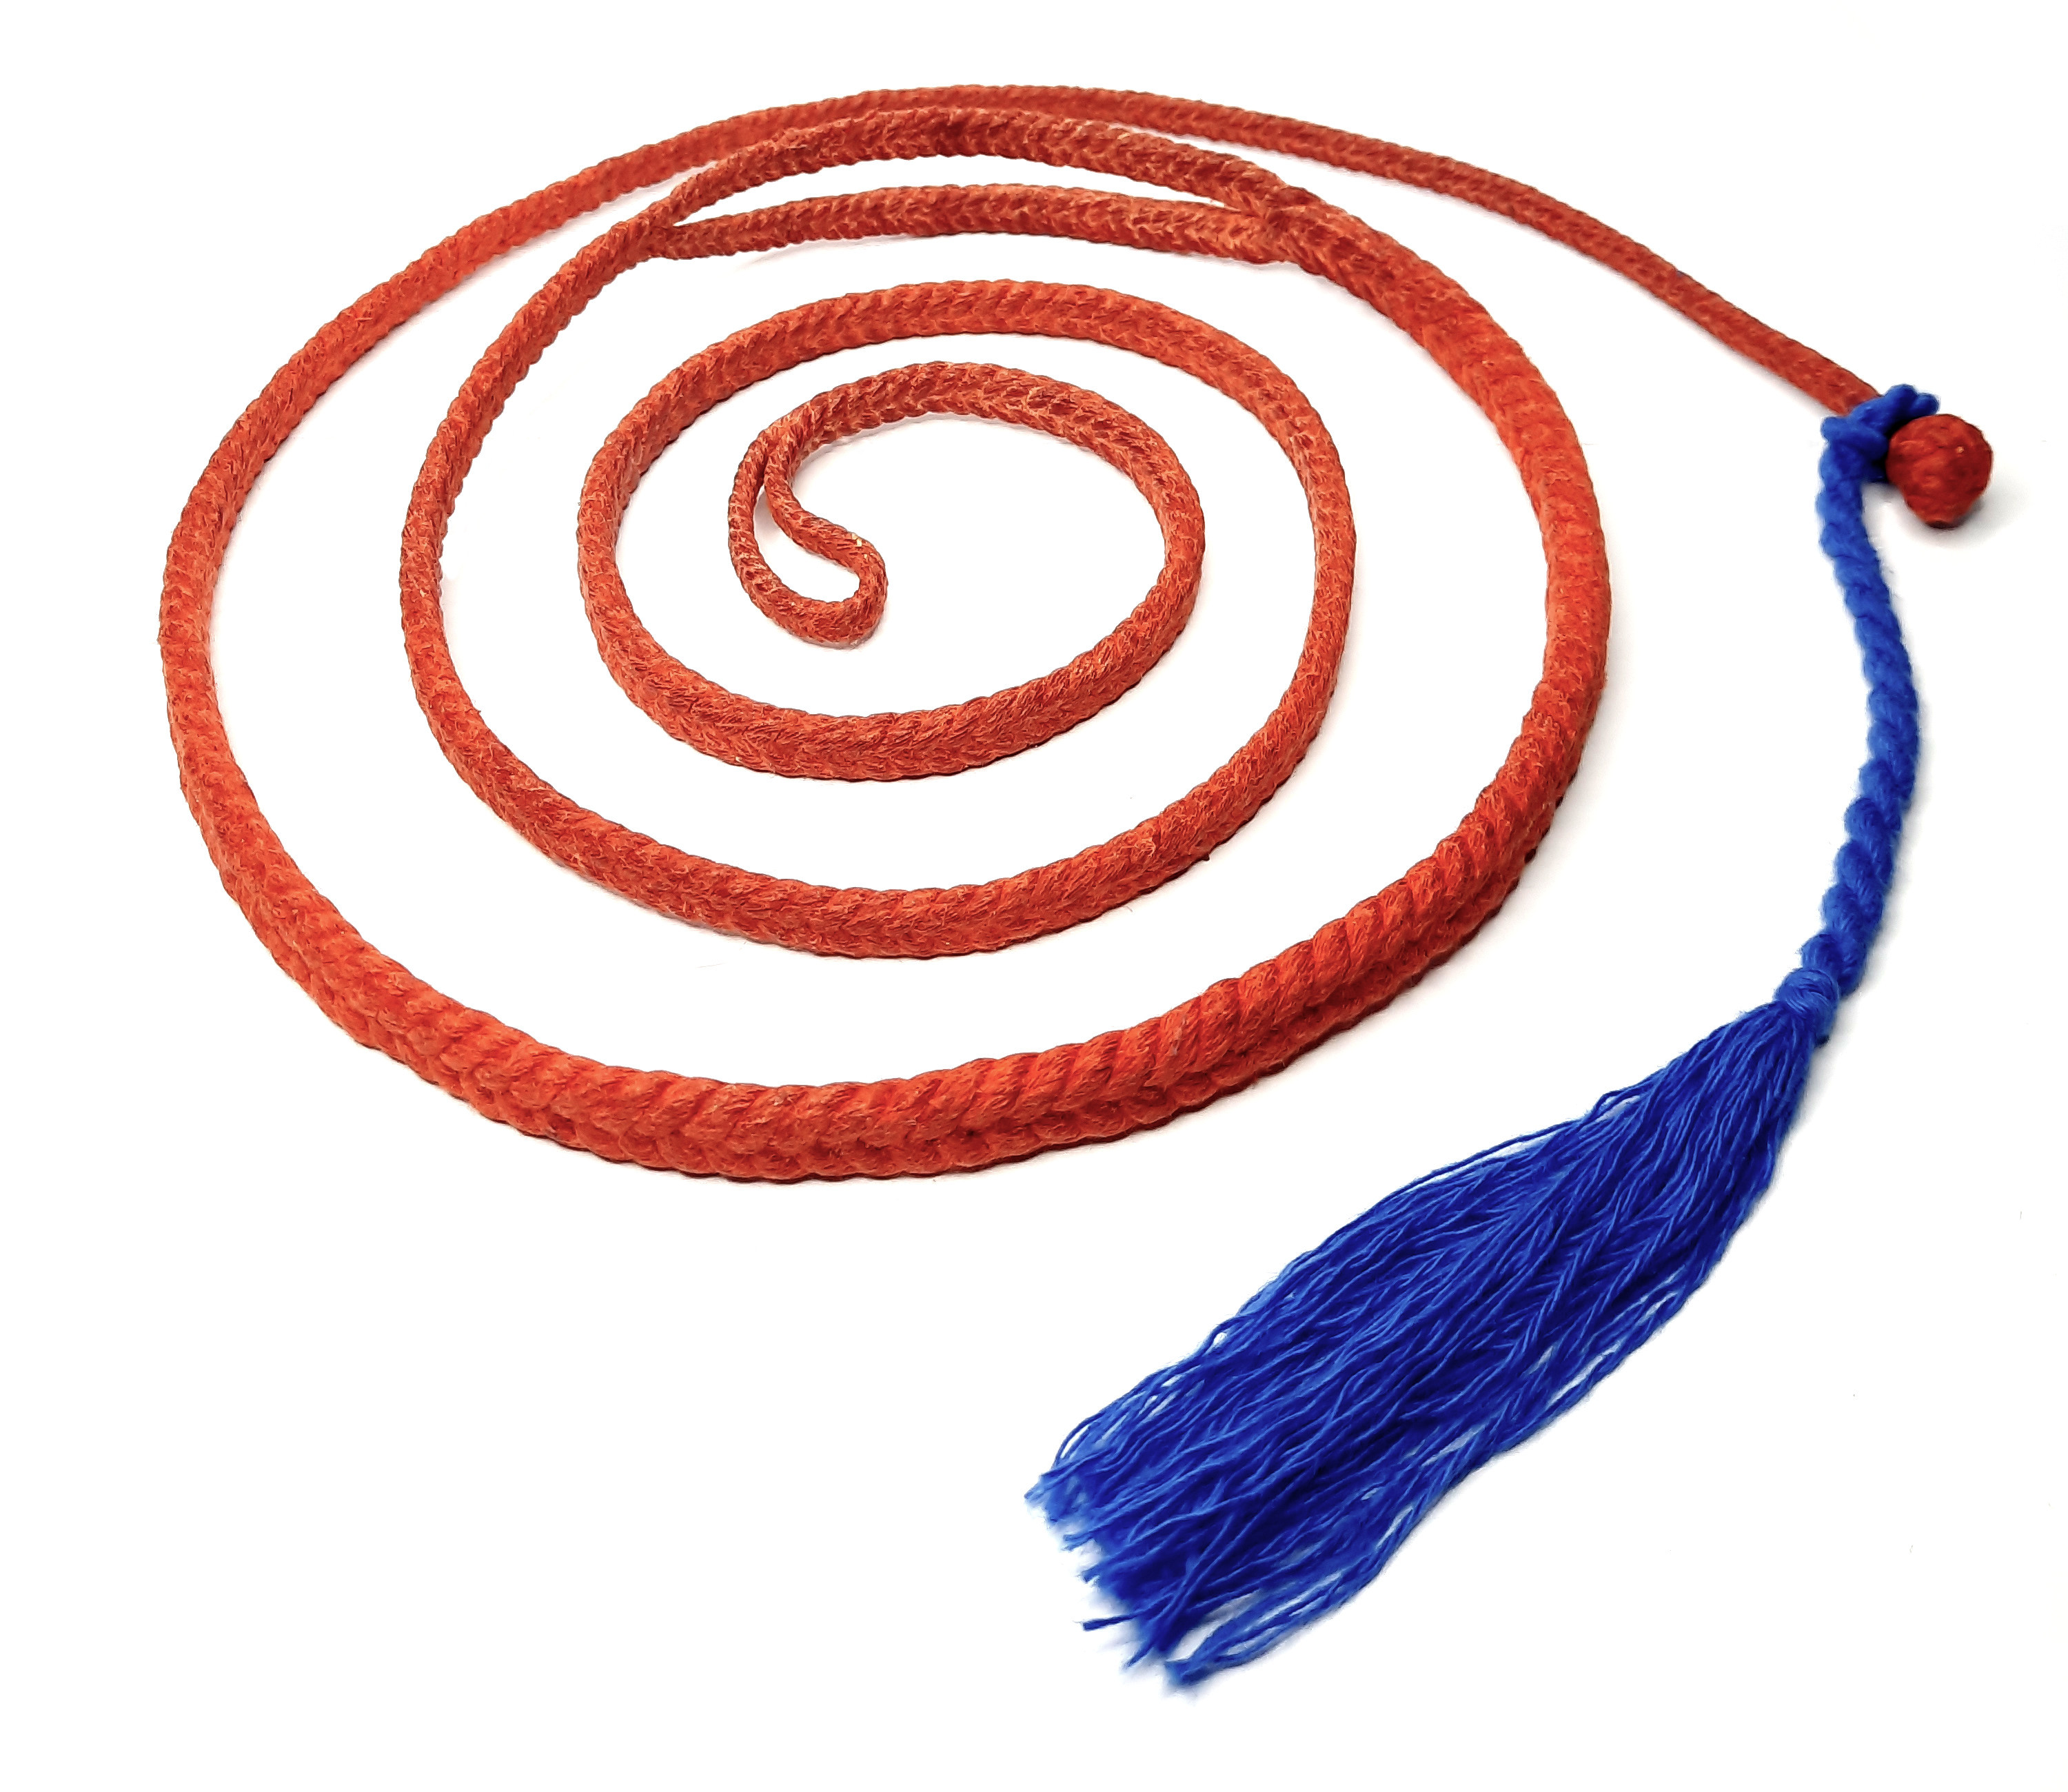
How to braid a Balearic-style sling
Slinging has a long tradition on the Balearic islands. Balearic slings are usually made from loose esparto or sisal fibers and are feature a characteristic braiding technique. The transition between the retention cord and pouch (the "knee") remains flexible, while the transition from the pouch to the release cord (the "belly") is thicker and heavier. The resulting weight distribution helps the sling to release better. The release cord tapers and ends in a tassel of loose fibers (the cracker). As these wear out quickly and have to be replaced by weaving in new fibers, plastic fibers are nowadays often added at the end of the release cord to improve the cracker's durability.
Instead of loose fibers, such a sling can also be made from yarn. Especially when first starting to braid such a sling, it is more easy than using loose fibers.
Basics
Balearic slings are braided with an odd number of strands. This tutorial assumes five strands, which is most common, but you can also only use three, which is faster, or seven and more, which results in particularly fine slings.
When braiding with an odd number of strands, the strands lie in two basic configurations that follow each other: The L- and R-configuration. In the R-configuration there are three strands on the right and two strands on the left. The L-configuration is just the same, but reversed. To make the following instructions more understandable, the positions, on which the strands lie, are numbered from one to five. In the R-configuration, R1 is the first strand on the right, R2 the second rightmost strand, and so on. Similarly, L1 is the first strand from the left in the L-configuration. To change from one configuration to the other, pull the first strand tight, twist it backwards and then fold it over between the the third and fourth strand. By twisting the strand, the braid assumes a more rectangular shape, which improves the handling of the sling and the stability of the projectile in the pouch. Pulling tight is just as important, especially when additional strings are added later. Try to apply equal force on the strands throughout the braid, to obtain a braid of even width and to prevent it from twisting.
Step 1
First, prepare the five strands of yarn. For that, take sufficiently many strings and tie them together in the middle. Their total length should be equal to six times the desired length of the sling, from finger loop to pouch center. The diameter of a twisted strand should be somewhere between 0.08" and 0.12". Each strand may consist of several individual strings.
Step 2
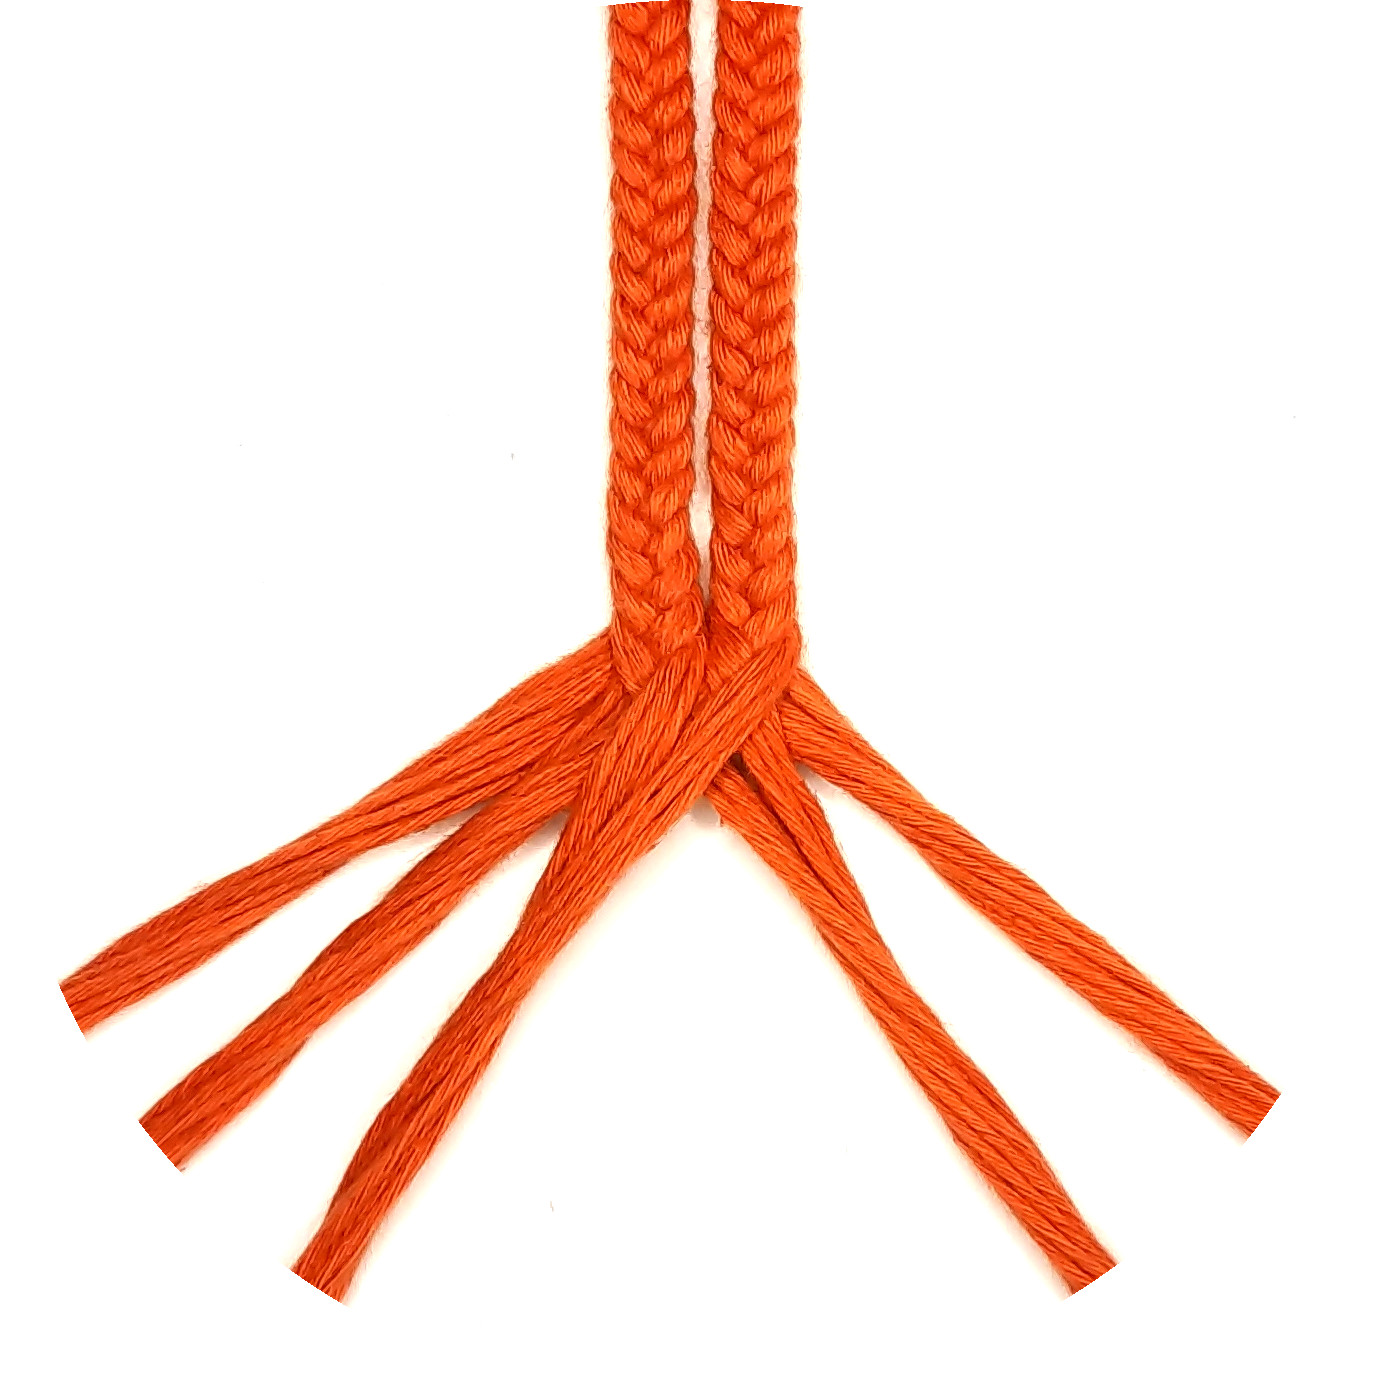
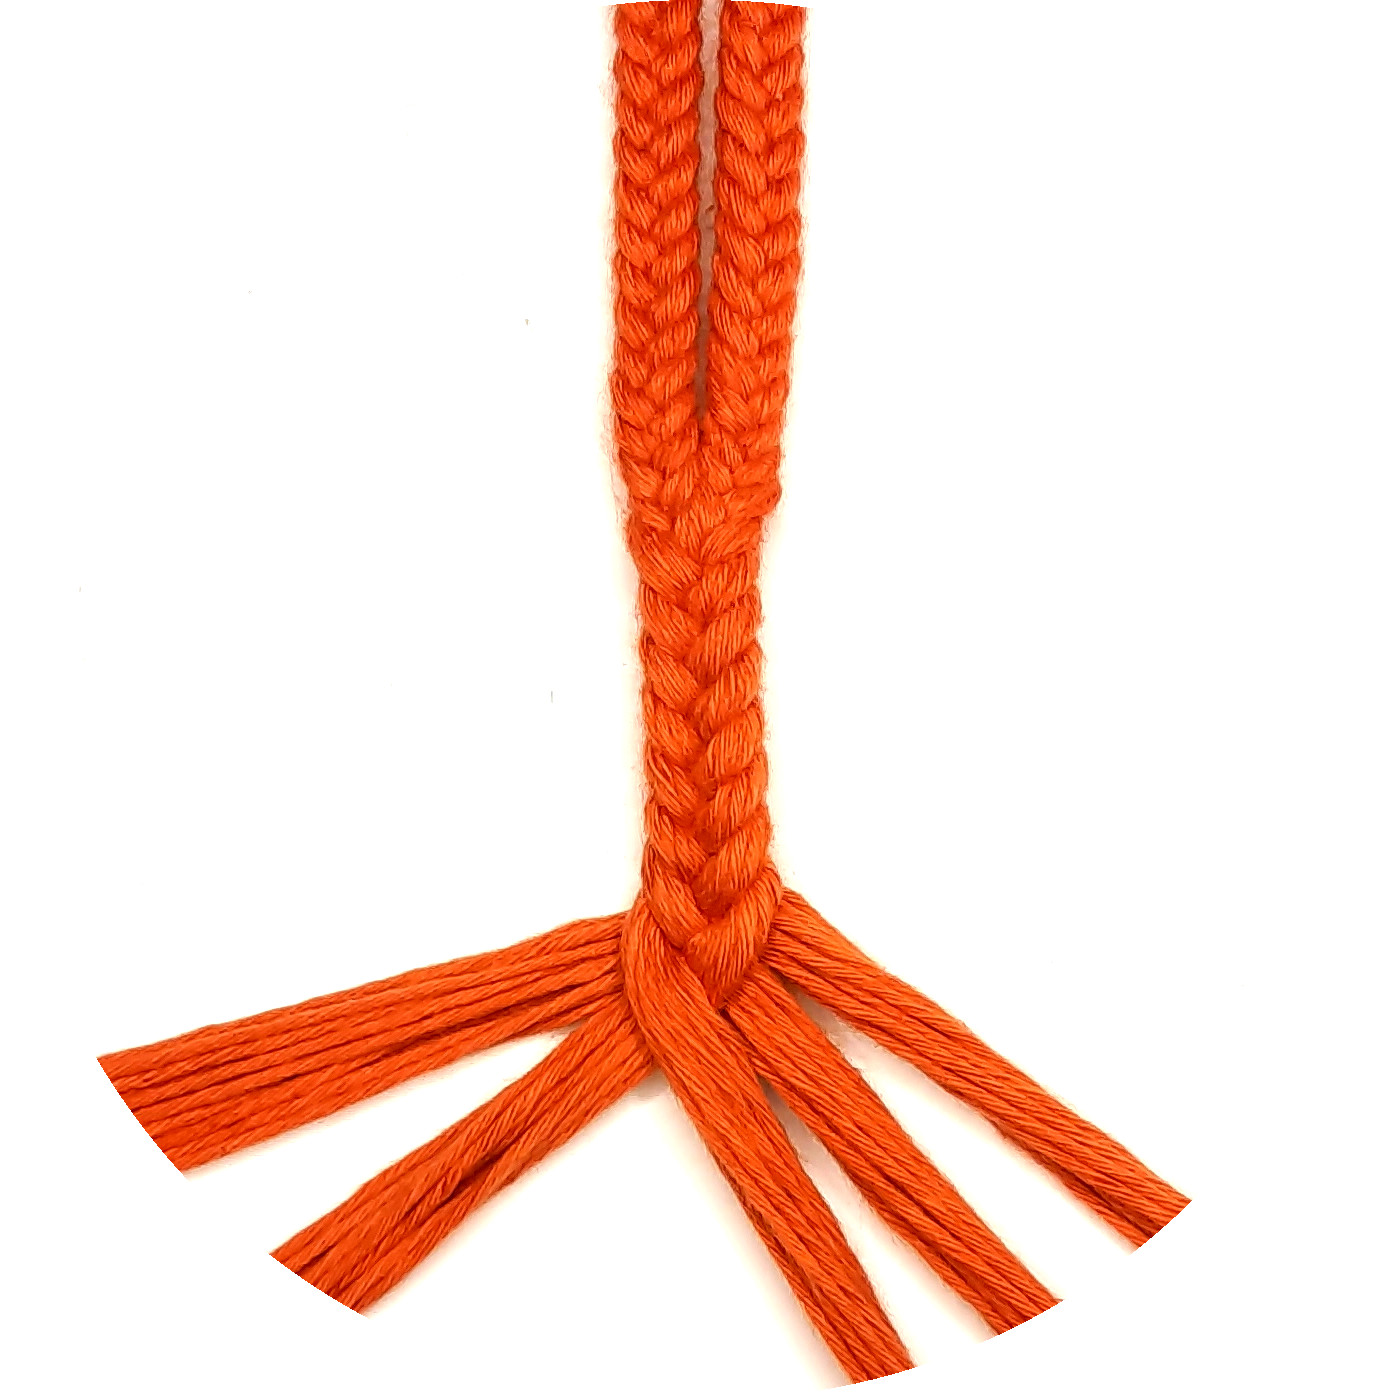
Braid the five strands for about 4 and end in the R-configuration. Fold the braided section to a loop, end on end, and join the corresponding strands.
Step 3
With the strands now being twice as thick as before, continue to braid the retention cord. Do so until its length reaches the desired length of your sling, less half of the length the pouch will have. Again, your braid should end in the R-configuration.
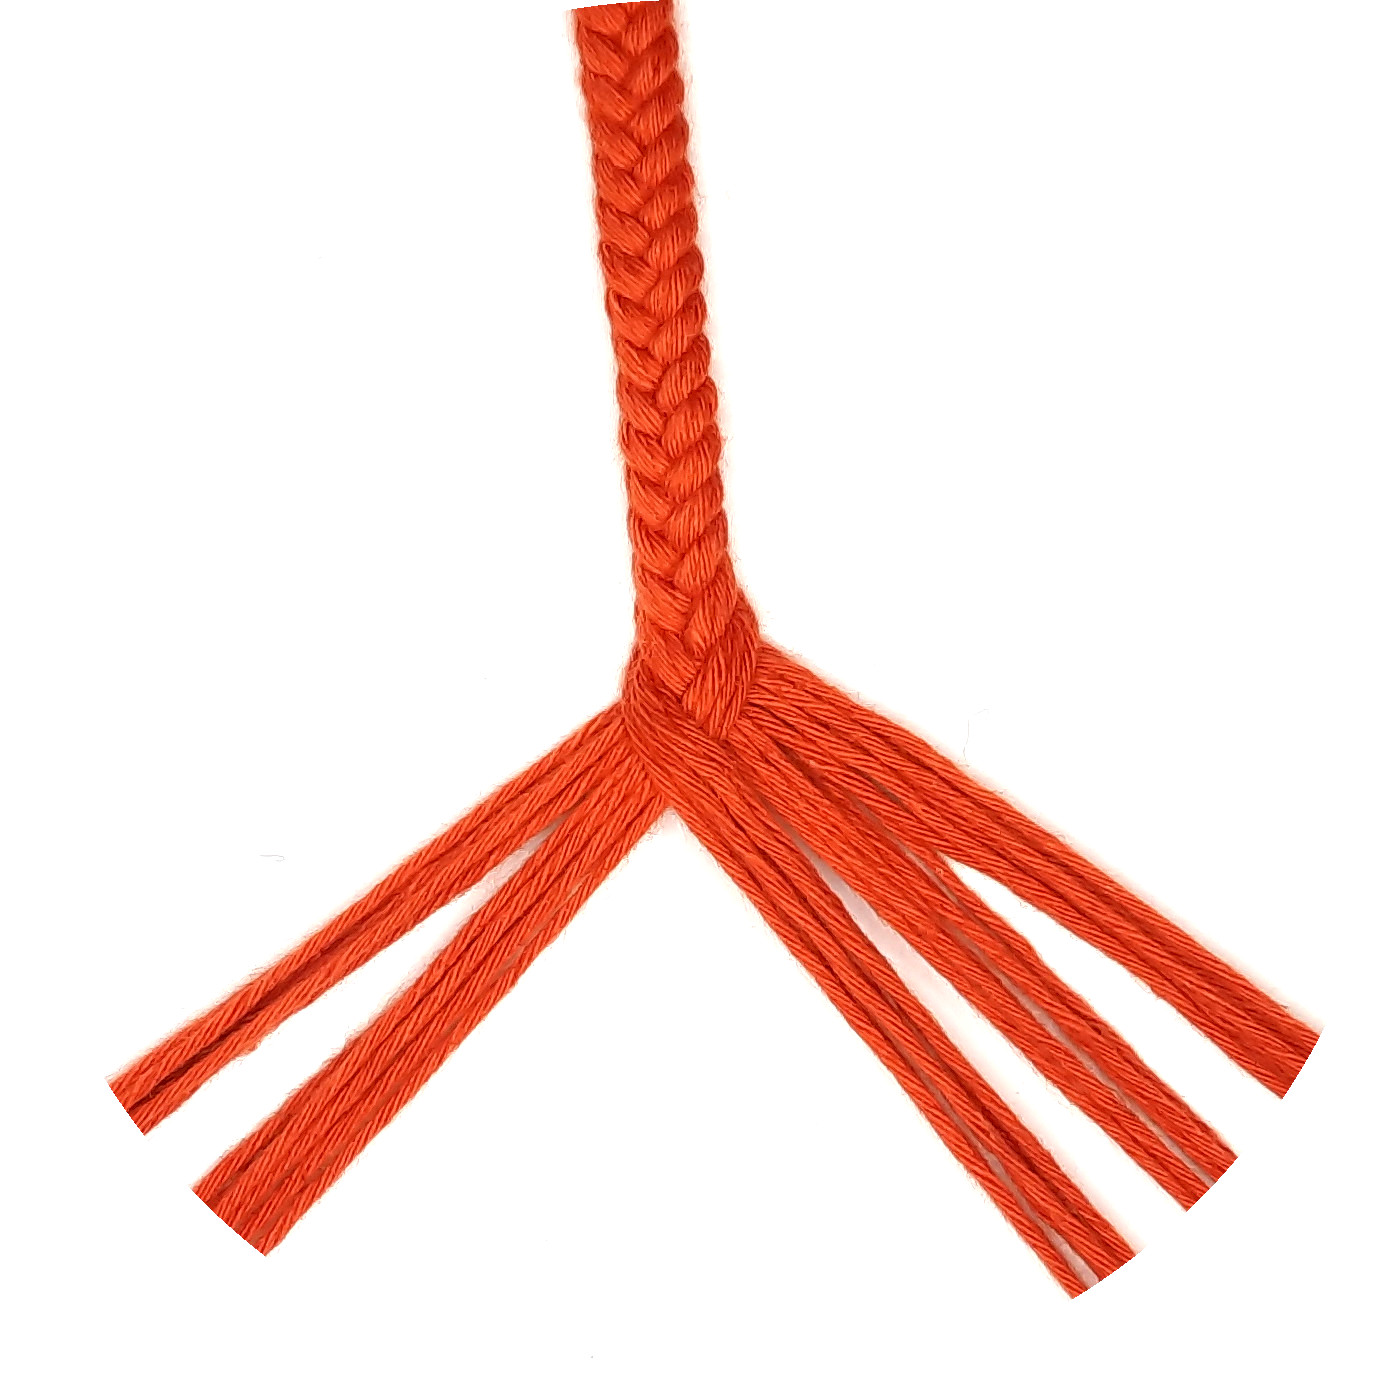
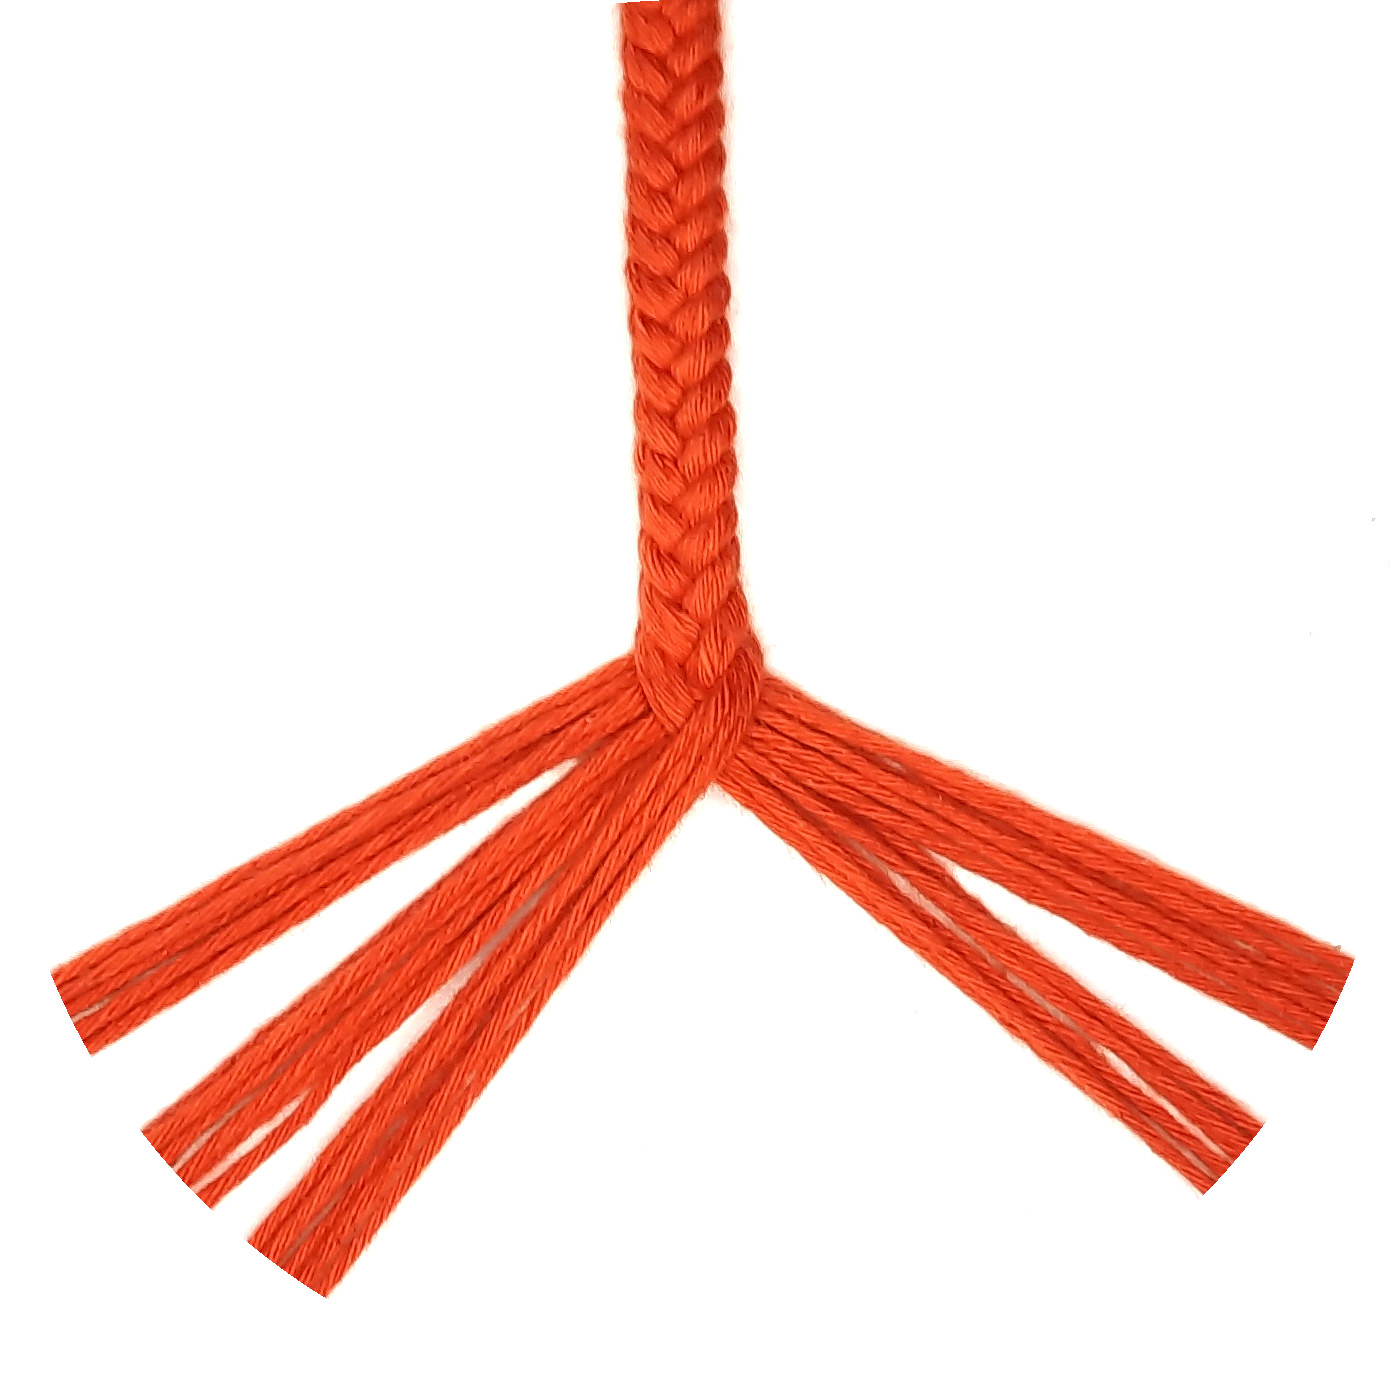
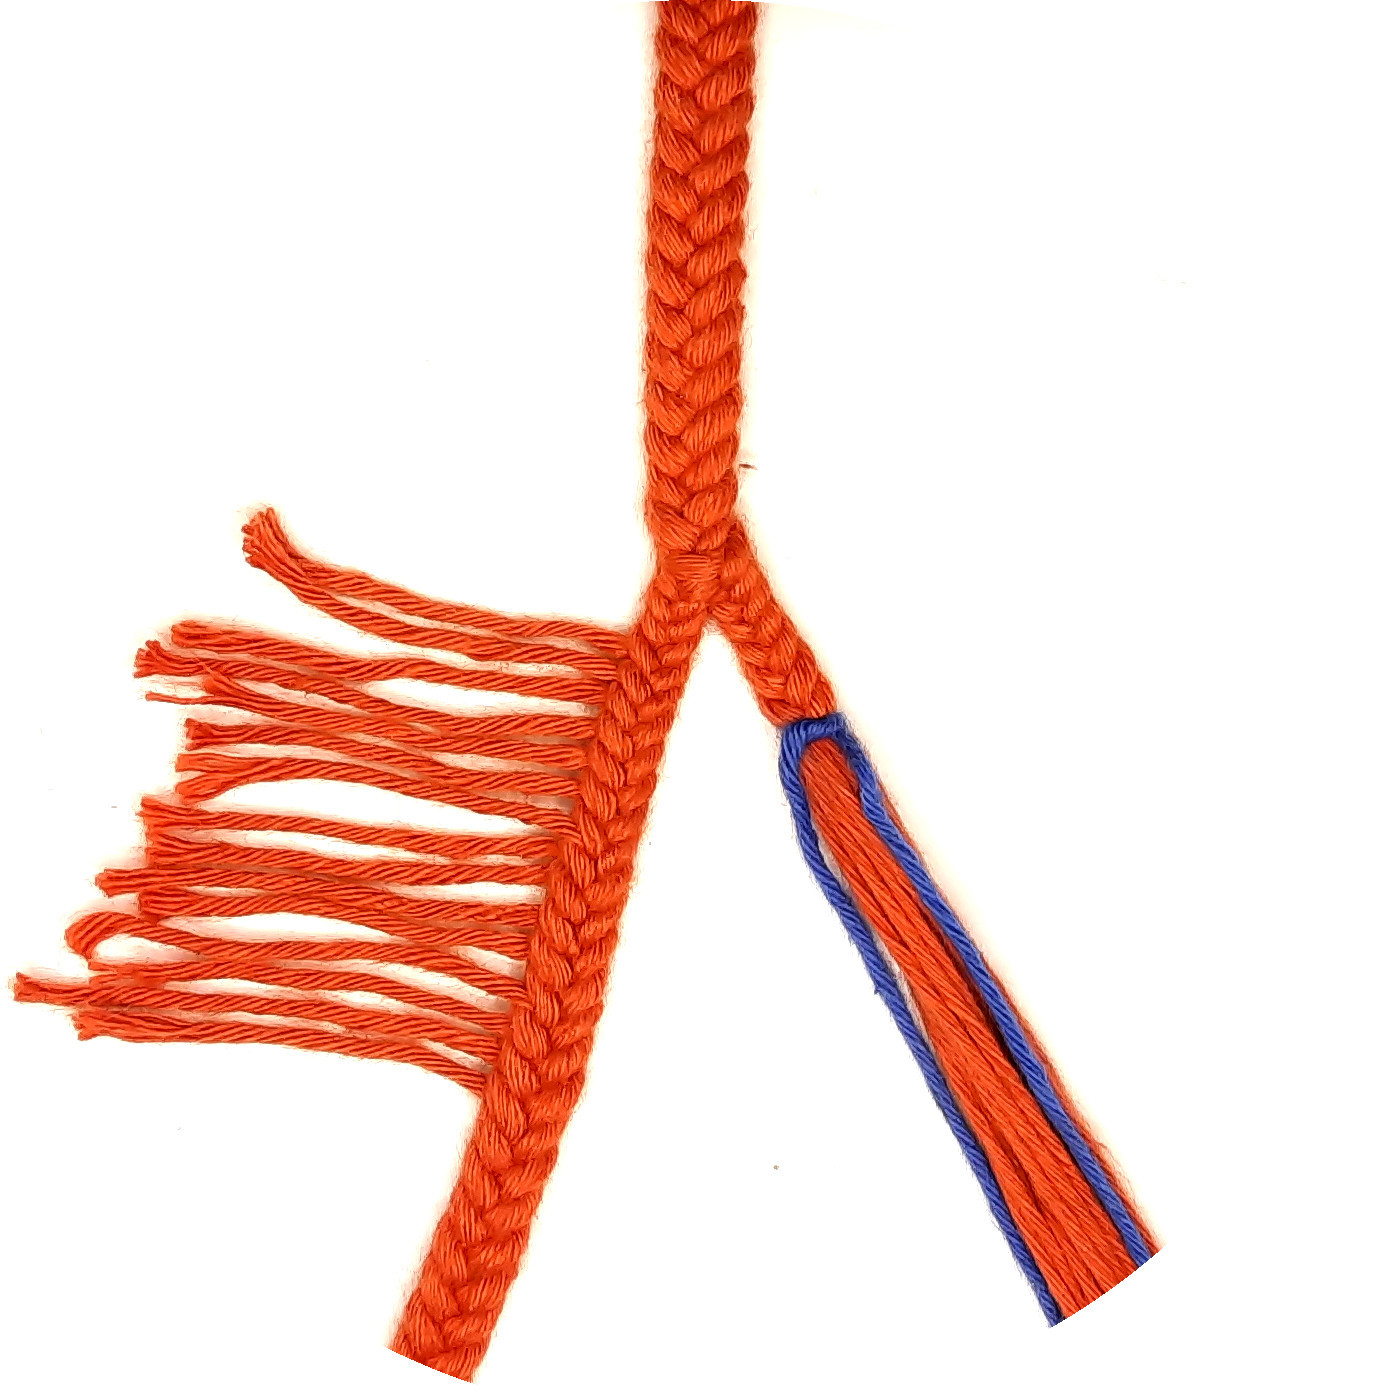
Step 4
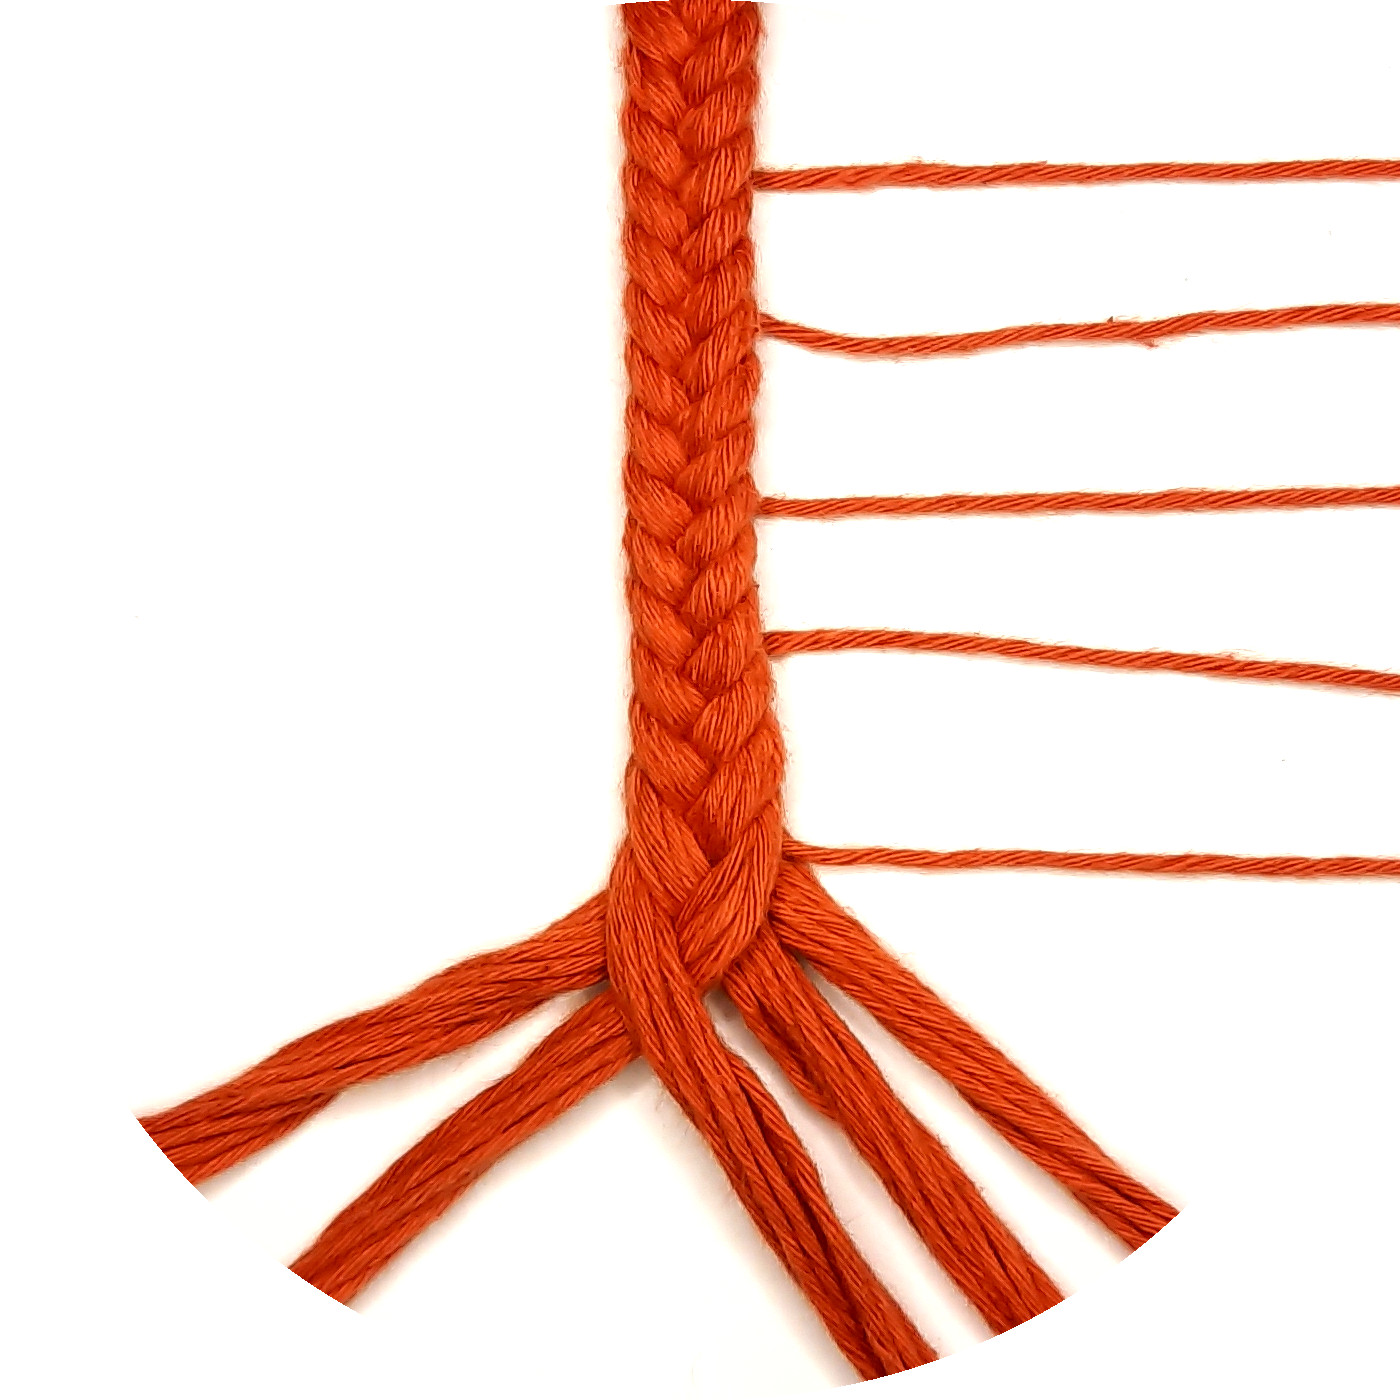
To braid the knee, where the retention cord splits into the two halves of the pouch, split each strand into two equal halves. This results in the K-configuration with ten strands. Again, the positions of the strands are numbered from one to ten, beginning on the right. In contrast to the previous two configurations, we won't distinguish successive reorderings of the strands. Now, braid the ten strands according to the following pattern:
- K1 between K6 and K7
- K10 between K5 and K6
- K2 between K6 and K7
- K8 between K2 and K3
- K4 between K8 and K9
- K10 between K7 and K8
As before, pull each strand tight before folding it over. Note that K1 to K10 do not refer to the individual strands, but to the positions on which the strands end up over the course of this sequence.
Step 5
The strands K1 to K5 and K6 to K10 now both lie in the R-configuration. Braid both for a short distance and finally fix them e.g. with clothespins.
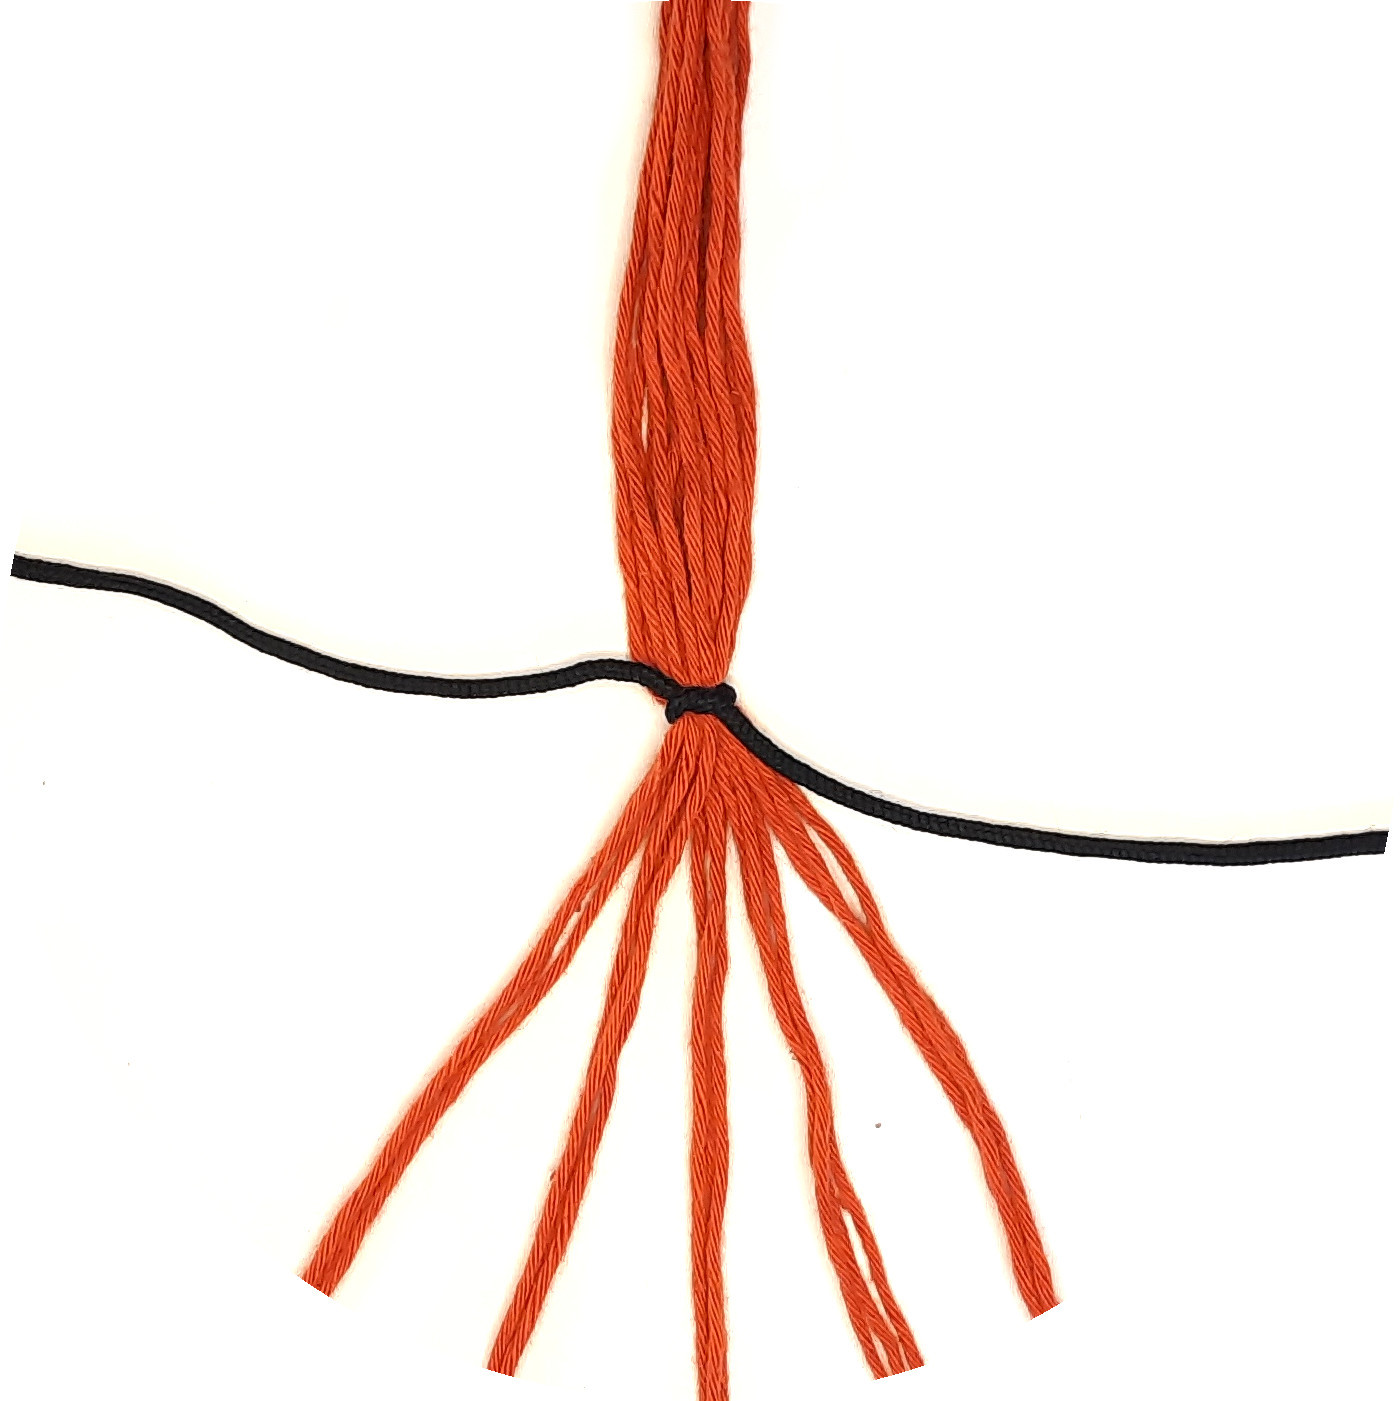
Step 6
Unbraid the left half, and pull the strands tight once again. Now start to braid and add an additional string to L1 in every L-configuration from here on, until all strands are as thick as they are in the retention cord. The added strings should be at least as long as the loose strings your braids end in.
Step 7
Do the same with the right half of the pouch. Following that, braid both pouch halves to an equal length, ending in the L-configuration.
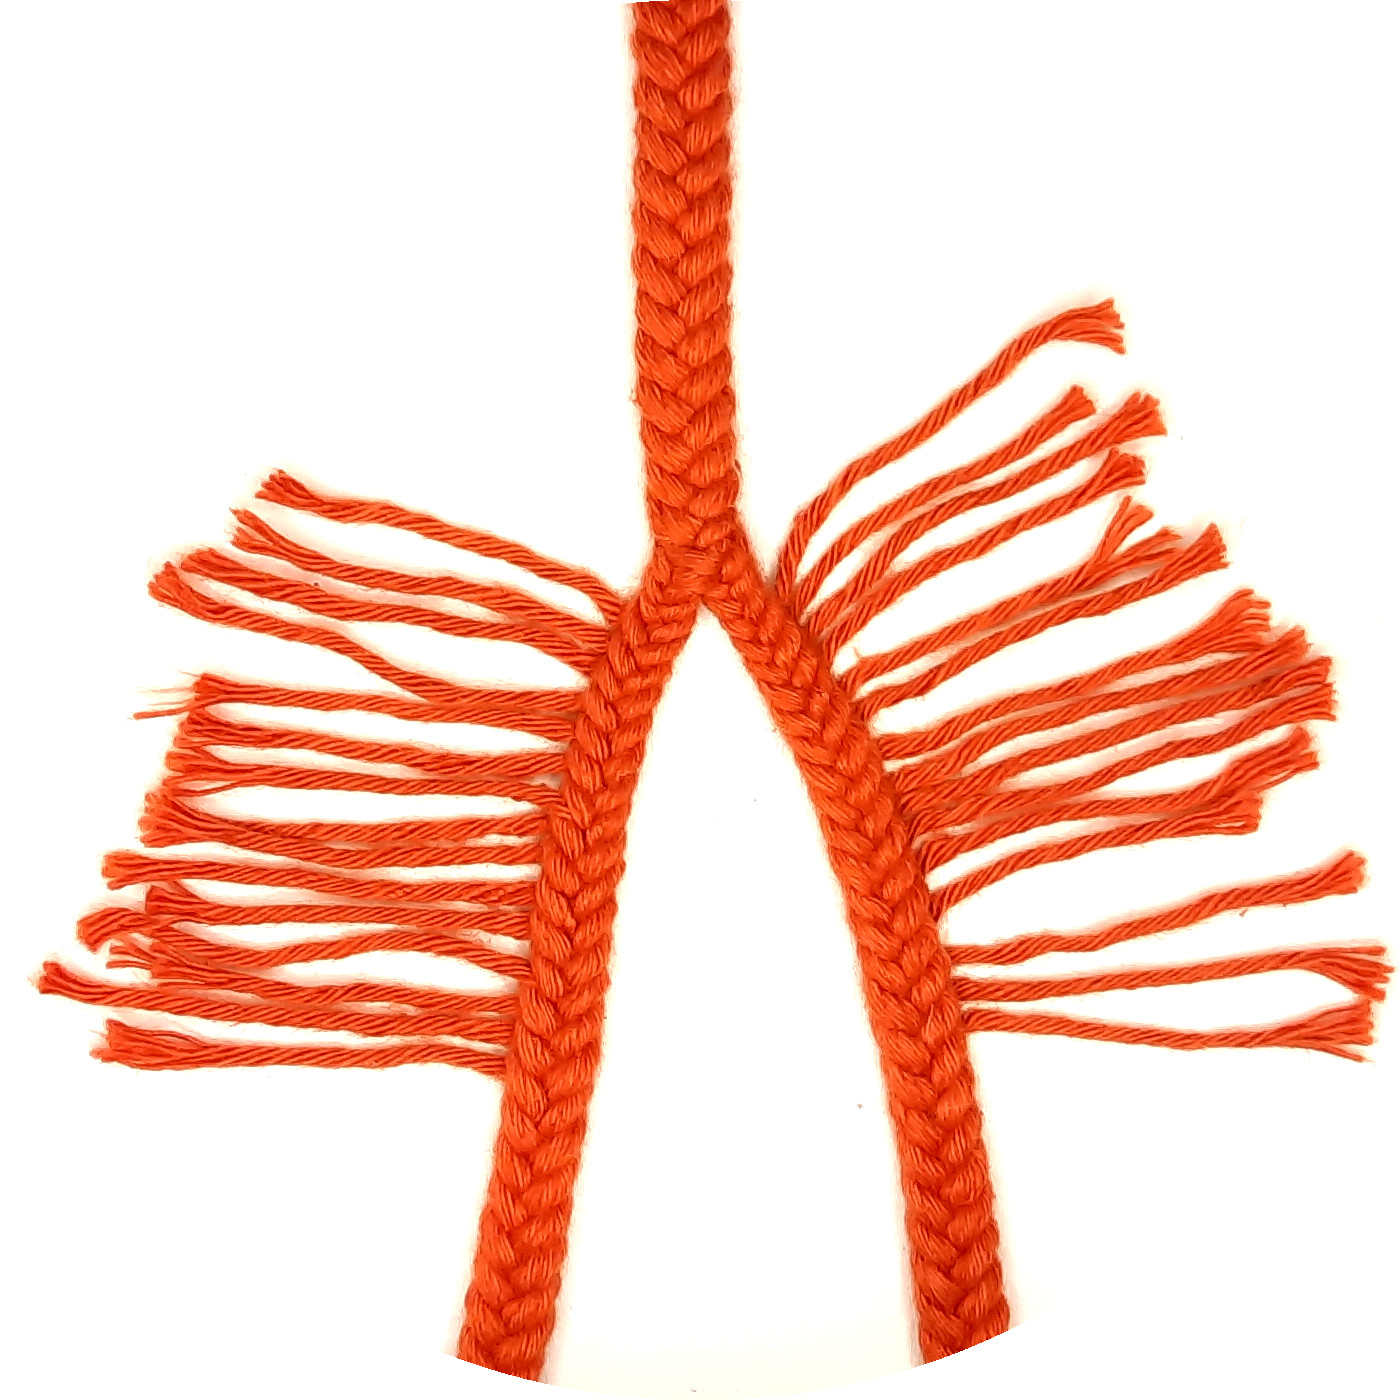
Step 8
To join the two pouch halves, merge the corresponding strands of both halves. L3 should lie on top of all other strands, followed by L4, L2, L5 and finally L1 at the bottom.
Step 9
Braid the five strands for about an inch or two. Especially during the the first few braiding steps it is important to pull all strands equally tight to obtain an even and symmetrical pouch. If you overdo it, the right pouch half will be pulled under the left half.
Step 10
The release cord continuously tapers down to the point where it is pinched with the hand. For that, periodically remove one string from R1 and continue to braid without it. Take care that the strands taper evenly.
Step 11
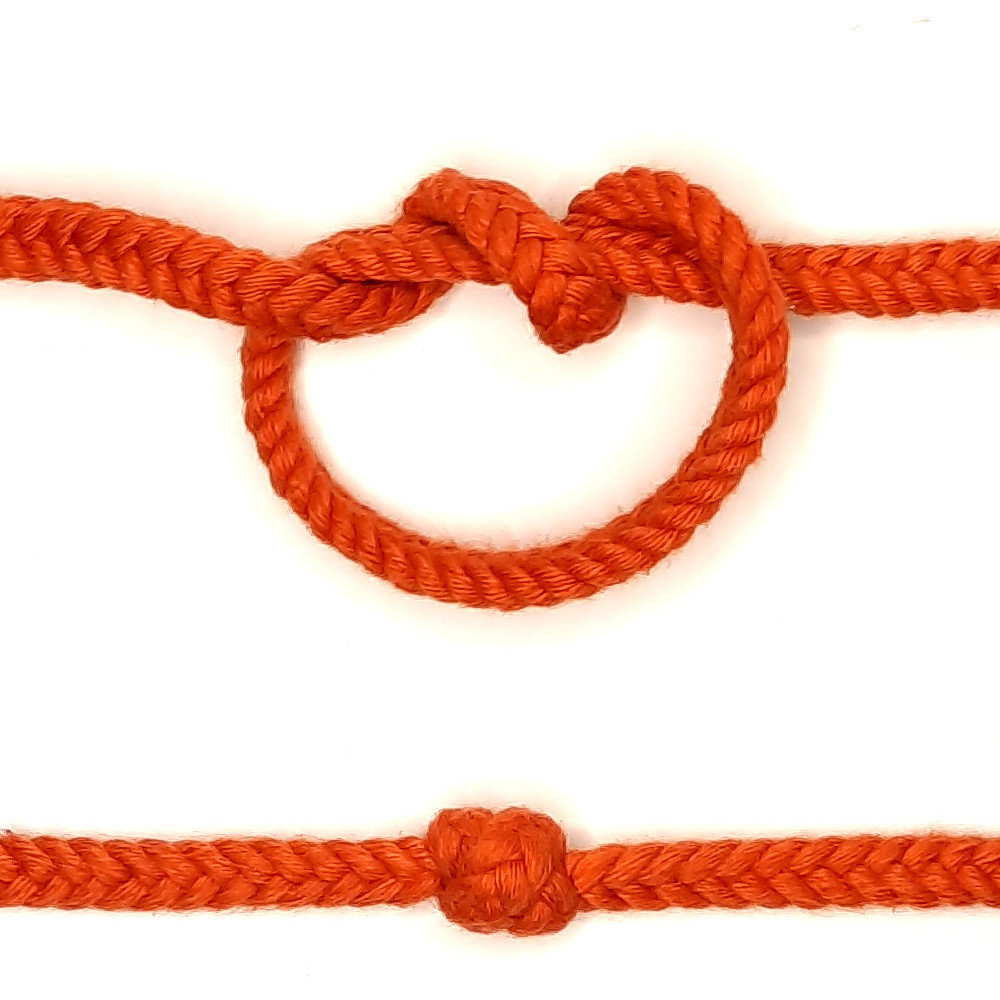
Now the sling is almost finished. You can terminate the release cord with a knot or a loop (see Back-braiding a loop). A double overhand knot is quite sturdy and symmetrical and allows to attach a cracker.
Step 12
After all loose strings are cut, I recommend to wax the sling thoroughly. Cotton, in particular, is very stretchy otherwise, while untreated flax and hemp are sensitive to moisture. Additionally, the sling becomes more stiff, which helps to control the pouch orientation, and much more abrasion-resistant.
Natural beeswax is particularly suitable for waxing. Take a lump of wax and repeatedly heat it over a candle to apply it to the sling. Once it is covered with a layer of wax, carefully melt the wax with a heat gun or in an oven set to 160 °F. After the sling has cooled, flex every spot of the sling back and forth to make it more pliable. Finished!